Read more here:
]]>Kristen is the author of a beautiful new book,, a playful, approachable guide to creating forty-five stunning arrangements. To celebrate the launch of his beautiful new book, we sat down with Kristen to chat about his daily rituals, creative process, and studio must-haves.
Read ourq+a below and stay tuned for an exciting giveaway on Instagramlater this month!
Mornings with two boys (5 and 2 years old) start early and are full of energy. Have you ever tried to wrangle two Tasmanian devils into a car seat at 7 AM? Well, I have, and let me tell you: If you don't have a sturdy net and pocket full of Teddy Graham Crackers, you're in trouble. Then once my beloveds are safely dropped off at school. I head to the flower market for some much-needed flower therapy.
"Days off?" What are those? Because I don't really get a day off outside of a planned vacation, I have really leaned into acts of self-care to reinvigorate myself and prevent burnout. Working with flowers has been one of the greatest acts of self-care I have been able to give myself. To be able to connect with nature and therefore connect with the greater world around me through the beauty of nature has been an essential part of my design practice and life.
What surprised me the most was how personal the arrangements became for me. I wrote this in the middle of the pandemic while raising a newborn. It was an intense moment of change for me and I think it made the arrangements a bit more dramatic than they would have been had the circumstances had been different.
Gotta have a good pair of clippers and some chicken wire. I can create anything with those two things.
Apart from my phone, keys, wallet, etc. I never leave home without my chapstick. Dry lips drive me nuts.
I find fashion and music to be a great source of inspiration for me. There is something about the flow and emotional storytelling that I find to be incredibly powerful and motivating.
We're thrilled to be celebrating the launch of Kristen's new book with this Q+A and a giveaway that will be announced on our Instagram later this month! You can order Flower Love or at other booksellers worldwide.
]]>Our Essential Ceramic Planter is perfect for propagating and was designed incollaboration with Grandmont Street with this exact purpose in mind. Keep in mind, if a pot is too big for the root system, the roots may have a hard time retaining all the water. We also always recommend planters with drainage holes for a healthy plant, and a tray to keep things tidy!
Follow along for a tutorial on how to transplant your plant cuttings.
1. First, place a few inches of soil in the planter, about 1-2 inches
2. Gently remove the rooted cutting from your glass vessel, be careful not to break any roots if there is a narrow opening!
3. Place the cutting in the center of the planter, and cover the roots with soil, leaving some space on the top of the vessel.
4. Water the plant until you see a little water come out of the drainage holes and into tray.
5. Place the planter in an area of your home that provides the best light for your specific plant. Check on your plant by touching the soil, until the roots are developed more robustly, you’ll want to keep the soil moist but not constantly saturated with water.
Enjoy your new houseplant!
]]>We are so excited to share the tradition of bayberry candles with you this season!
Growing up in New Hampshire, my mom owned a small candle shop - I suppose I’m a 2nd generation candle purveyor of sorts! I remember my mom’s stories of customers who were so excited to find bayberry candles in her shop this time of year, and those who traveled far and wide specifically for these festive tapers to uphold the tradition of exchanging bayberry candles with friends.
Bring good fortune to your home and share well wishes with friends with our hand dipped bayberry candles this holiday!
For Giving Tuesday this year, 㽶Ƶ is donating 20% of thetoday's sales to the.
Join us in making this Giving Tuesday meaningful.
Join 㽶Ƶ & and ring in the season with a ! Led bySierraSteifman, founder of boutique floral house Poppies & Posies and 㽶Ƶ, this workshop will teach you how to create low, lush floral centerpieces for your holiday celebrations.
Utilizing seasonal flowers, foliage, and 㽶Ƶ’s vessels and tools, we welcome you to join us in the meditative art of arranging flowers and the ritual of lighting candles ahead of your next gathering. The seasoned experts at 㽶Ƶ will share tips on curating candles and how to style your table with candlelight to create a warm ambience for guests.
This workshop is open to all experience levels. Each participant will leave with their own centerpieces (flowers + vase) and the confidence to do it again on their own.
The Parcel Flower Co. will generously offer 10% off any in-store purchase on the day of the class!
To RSVP and purchase tickets, please .
We look forward to seeing you soon!
]]>Julia Finlayson’s beautifully minimal and textured pieces are right at home here at TFS. Delicate bud vases for little blooms. Incense and pillar candle holders for your tablescape or entryway. Dishes and pots with expressive glazes. Julia can truly do it all.
As floral designers, we know the best results come from just a bit of direction, plus lots of freedom to play and create. With Julia, we were able to strike that balance. She took the functionality we had in mind and ran with it, creating a stunning (and collectible –you’ve been warned) collection for us.
Incense Holders
Taper Candle Holders
Planters & Pots
Pillar Candle Holders
Match Strikes and Vessels
The collection is now available in 㽶Ƶ.All pieces are limited and one-of-a-kind. We hope you'll enjoy them as much as we have already.
Inspiration for your summertime bouquet. Just-picked or garden-style bouquets have a looseness and spontaneity to them. They often mix leafy branches with a variety of textures, large face flowers, and delicately detailed multi-bloom flowers. We love to cluster like flowers to mimic how they would grow in nature – or in a garden. The overall silhouette is asymmetrical and a little wild. Informal, natural beauty.
BRIDE & BRIDESMAIDS
We used the same flowers for the bride and bridesmaids, distinguishing them with scale and number of focal blooms.
Trying your hand at a DIY bouquet this season? Tap below for guidance. The right technique makes all the difference.
We’d love to see what you make!
Our favorite time of year has arrived — spring.
Typically, we rush off to the flower market or to to cut some blooms. Let our favorite spring blooms offer some inspiration! Reach out to your local florist — or start to grow your own. By the time your blooms come in, it may be time to dress your table and invite friends to enjoy with you.
Photos by Jen Huang
Daffodils
Ranunculus
Poppies
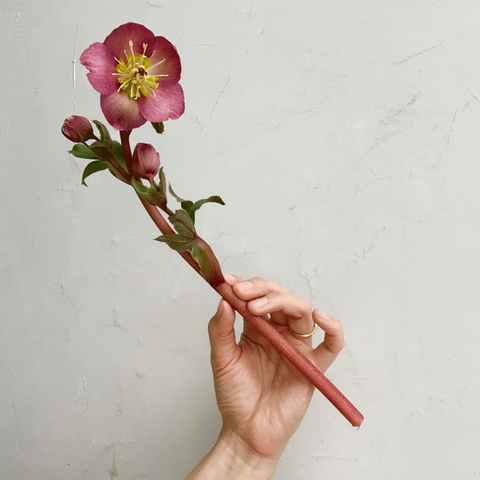
Hellebore
Muscari
Sweetpea
]]>Photos by Jen Huang
Ikebana is the Japanese art of floral arranging or “making flowers alive.” Often minimal, asymmetrical, and unexpected, these arrangements typically rely on flower frogs and low bowls as bases.
Expert tip: Less is more! Build your arrangement slowly to avoid over-crowding.
Supplies used: Ceramic Flower Frog Bowl
Informal and a little wild. These arrangements look like beautiful, naturally-occurring groups. The garden, indoors!
Expert tip: Create texture with a variety of bloom sizes and shapes. For both of these we combined wide, solid petals with delicate, detailed blooms.
Supplies used: Essential Tools
Unexpected combinations, exaggerated lines, and asymmetry. A touch of drama. This style is fun, edgy, and best of all – forgiving! Great for beginners.
Expert tip: Go against the grain when picking blooms. Mix formal roses with herbs and wildflowers.
Supplies used: Vases
Negative space counts as much as a bloom with these. Keep the number of flower varieties minimal and let plenty of space remain between stems.
Expert tip: Branches are brilliant at getting stable, elegant height. Try flowering dogwood, as seen above, or cherry blossoms.
Supplies: Floral Clippers
Show us what you create. Tag us on Instagram . The most important tip to remember — have fun.
A rainy afternoon, spent watering the plants in the TFS studio, inspired this post. May these tips help you grow more familiar with the plants you have – or invite a new variety into your home.
Every plant is different and getting to know their preferences is an honor and a joy. Tap through each plant for tending tips:
Asparagus Fern
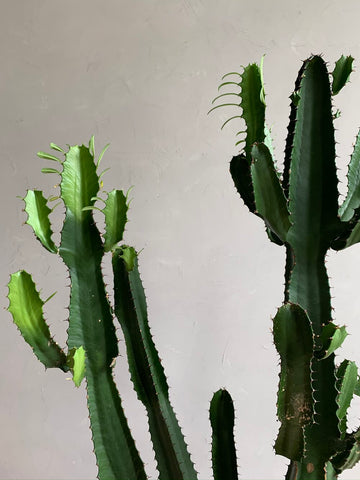
African Milk Tree
Philodendron Xanadu
Narrow Sword Fern
Fiddle Leaf Fig
Arrowhead Plant
Parallel Peperomia
Banana Leaf
Dragon Tree
Rubber Plant
Share your plants with us .
]]>Arranging these blooms, I felt focused and grateful. Flowers bring joy and life, beauty and nature into our homes. Even in these overwhelming times, their power is transformative.
I grabbed a few quick snapshots as my arrangement took shape. If you can get your hands on some blooms, click through these images to follow along.
- Sierra
Getting Started : Tools
All of the tools I used are in ourArrangement Workshop.
Tape your floral netting into your vessel with floral tape. I used a flower frog in the bottom, but that’s optional.
I started the shape of my composition with peach quince, adding hellebores for depth.
I added peach ranunculus in clusters, continuing to build at various levels.
A pop of yellow daffodils - clustered to one side for more impact.
Finish the arrangement with your most delicate detail flower. I used poppies.
Pro tip: If you’re also using poppies, sear the ends of them - rather than cutting. This video will show you how:
Thanks for following along! I hope there are some flowers in your world.
PS. If you want more tutorials, look no further.
]]>When creating an arrangement of this size, proper vase setup is crucial.
This part isn’t glamorous, but so essential! Doing this part right will ensure your blooms last as long as possible and your arrangement stays in place.
Start with a clean, dry vessel. Leftover flower debris creates a breeding ground for bacteria, which shortens the lifespan of your flowers, so "clean" is important!
Use a generous amount of floral frog putty to adhere the pin frog to the bottom.We use Sure Stik.
Create a cylinder or sphere (depending on vase shape) out of TFS floral netting. It's okay if you need to crush it into the vase a little — the pressure against all sides will help keep everything stable.
Further stabilize your mechanics by taping it down in a cross with your TFS waterproof tape.
A solid foundation makes all the difference. We hope this helps!
Show us what you make — .
]]>We choose our packing materials for sustainability and function. Recycled, recyclable, and compostable. Tissue, kraft paper, and cardboard.
(If you get packing peanuts in your order, those are natural and dissolve in water. Dissolve, don’t toss!)
We love letting these humble materials serve a more beautiful purpose on their way to the compost pile – gift wrapping. Follow along as Rosalie uses each part of our packaging to wrap a beautiful present, topped with a sprig of evergreen and dried orange.
Show us what you make!
Versatile and beautiful, natural and compostable! A time-honored, festive element to usher in warm fragrance and nostalgia. A great craft to share with kids and enjoy all season long.
Replace your fresh pomander every few days, as needed. Dried pomanders last longer. If you prefer dried, bake at 250 for several hours – without the ribbon.
Show us what you make!
Quick, casual, and virtually foolproof! What’s the secret to a five-minute tablescape?
Bud vases.
Stagger your bud vases with one or two flower varieties in each. Play with height and spacing, add candles as desired, and you’re done!
Choose blooms with different textures, weights, and heights.
Keep each bloom within the same range of color so that the group looks intentional.
A variety of vase shapes will help lead the way. Ours are made for layering!
Intersperse taper candles throughout to further marry your composition.
Flexible and low pressure: When entertaining, you can move each element about as needed.
Long-lasting: If one of your blooms outlasts another, you can swap stems without starting from scratch.
If you’re using candles on your table, this is a must.
Always ensure your tapers are very snug in their holders. Especially with hand-dipped candles, there's bound to be some variation in circumference. That may mean you need to shave the base down a little. If the candle wobbles, use some TFS Candle Helper for extra insurance.
Show us what you create! Tag and as always, have fun.
]]>Tips from our team to your garden - organic, effective pest repellents, fertilizers, and more.
Crush rinsed, cleaned eggshells. Place them around the base of the plant to deter slugs, or mix them into the soil to increase calcium content.
Soak banana peels in some water for a few hours for use as a quick fertilizer.
Pour coffee grounds and leftover black coffee around plants that like acidic soil. It also deters slugs, snails, and other pests.
Flowering trees and shrubs: hydrangeas, azaleas, dogwoods, magnolia
Vegetables: sweet corn, cucumbers, lettuce, leeks, eggplant
Herbs: lemongrass, thyme, rosemary, basil, oregano
Add 2-3 tsp of dish soap to 1 gallon of water.
Spray every 2-3 days until the infestation is gone.
Sprinkle ground turmeric, or apply a quick paste (made with a touch of water), to heal a damaged plant as it has antibacterial & antifungal properties.
Sprinkle ground cinnamon on the topsoil of both indoor & outdoor plants as a fungicide. Cinnamon reduces the growth of mold and mildew on the soil and also keeps away mosquitoes, gnats, and mites.
Mix 1 gallon of water with 3 Tbsp vegetable oil.
Funnel into a spray bottle.
Spray on leaves, front and back.
Mix 1 gallon white vinegar, 1 cup salt, and 1 Tbsp dish soap.
Funnel into a spray bottle.
Spray on leaves and stems of weeds, but avoid saturating the soil!
Add a nourishing organic boost to your garden and houseplants with Arber, a science-backed line of plant wellness products for indoor and outdoor green spaces.
Organic Plant Food, Organic Bio Fungicide, Organic Bio Protectant, Organic Bio Insecticide are available in our Garden Collection here.
Cheers to your garden thriving, and your future harvests, whether vegetables or blooms. Show us what you grow!
]]>We’ve condensed our own years of trying and testing into a collection of versatile, quality essentials, all made in Japan.
Our floral clippers and floral pin frogs are perfect for precise floral arranging and practicing ikebana.
Japanese craftsmanship is unparalleled in the world of tools. The Japanese tool industry grew out of a long tradition of swordsmithing katana — or close-combat samurai swords. Precision blacksmithing and quality design have created a legacy of durable, reliable tools, from gardening and cooking to floral arranging and woodworking.
For 㽶Ƶ, we’ve collected our core necessities for floral arranging and gardening. We hope these tools bring you hours of enjoyment and creativity.
Hori means ‘to dig’ in Japanese, but these nimble and versatile garden knives do that and more. Sometimes referred to as a weeding knife, our Hori Hori Knife is also ideal for digging holes for transplants or bulbs, dividing, and pruning. It is crafted with one serrated edge and one smooth, using Japanese blacksmith heat treatments and techniques.
These razor-sharp and lightweight pruners are a must-have for the home gardener. Perfect for light- to medium-duty pruning, these shears will be your go-to tool for deadheading roses, perennials, and annuals. Use for shaping shrubs, ornamentals, and fruit trees. Excellent for reviving old bouquets with woody stems and foraging branches from the woodland for vase forcing.
Perfect for small gardening tasks, houseplants, or tending to seedlings. A great size for little green thumbs, too. Both tools are hand-crafted, using Japanese sustainable beech wood for the handles and Japanese stainless steel blacksmith heat treatments and techniques.
Features hand-sharpened edges for optimal depth and angle for slicing through soil and roots with ease.
Features hand-formed prongs creating optimal angles to make your weeding and cultivating tasks easy.
A kenzan, commonly known as a pin frog, is the essential tool used to create Japanese-inspired ikebana floral arrangements and is also the foundation of any architectural arrangement. Ours are sharp and precise, with a sturdy weight and removable, non-slip rubber base.
Our original — one of the first tools we created for TFS. With teflon-coated carbon steel blades and thermoplastic elastomer handles, the ergonomic design remains comfortable in the hand as you work. Ideal for trimming flowers, pruning plants, or cutting herbs and vegetables from the garden. Truly, the only pair you will ever need.
Straightforward and restrained, we love the less-is-more approach of a single-flower bouquet. Whether your overall aesthetic is minimal, or you simply want to let the focus fall on other details, scroll on for our top tips on letting one flower work its magic.
PEONIES
Lush and blowsy, a few peonies go a long way to create a ruffly, romantic bouquet. Just make sure to layer them for depth and to give each head room to breathe.
ESKIMO ROSES
A forever classic - roses are elegant and resilient, meaning that if you need your bouquets to last through a warm summer day roses are a great choice!
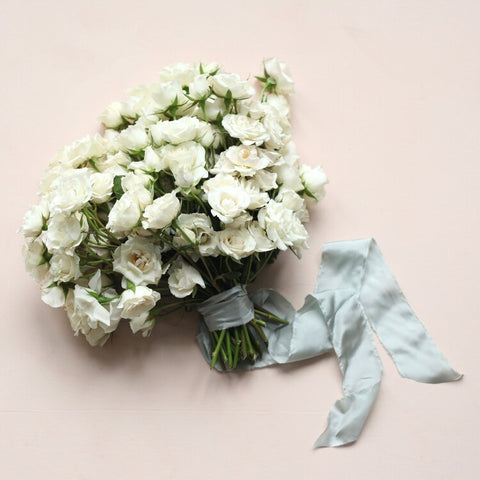
MAJOLICA SPRAY ROSES
More wild and dainty than your standard rose, a spray rose is a breeze to create a single-variety bouquet with since the blooms are already staggered along their stems in a completely natural way.
LISIANTHUS
The paper-thin petals of lisianthus are surprisingly sturdy, but simultaneously ethereal and delicate. We prefer to remove any green buds as well as any blooms that are still on the green side. It’s hard to let go, but you’ll give the best blooms the chance to shine!
It's easy to veer into flower ball territory when creating a single-flower bouquet, so you'll want to take care to layer blooms from the inside out so as to create depth.
Using your non-dominant hand to imitate the mouth of a vase, crisscross a few stems to create the outline of your bouquet shape.
Sink a few stems deep into the middle for substance to build on top of. Vary heights and fan the blooms out as you go.
To keep things neat and manageable, trim your stems as you work, and wrap with stem tape to stabilize as you go.
Remember to do a final cut just before placing in water to rehydrate!
If you're making your bouquets ahead of time it's nice to save the ribbon for the day of the event, to keep it from getting soaked in transport.
For visual instructions, tap the video below. With intentional placement, you can still build all the depth and interest of a varied bouquet.
The single-flower look lends itself well to tabletops, too. Try layered bud vases with multiple stems of one variety each. Easy, beautiful, done.
For more guidance:
The TFS guide to making your own bouquet
Our complete guide to DIY wedding florals
Words of advice from Sierra and the TFS team
We’d love to see what you make!
— TFS
]]>For a smokeless, drip-free burn:
1. Trim wick to 1/4"
2. Place snugly in a taper holder
3. Burn in a draft-free space
4. Use a candle snuffer to extinguish
5. Trim wick before each use
6. Never leave candles unattended
For a smokeless, drip-free burn:
1. Trim wick to 1/4"
2. Place on a heat-resistant surface and avoid drafts
3. Burn for 3+ hours the first time you use it, to pool the wax properly
4. Use a candle snuffer to extinguish
5. Trim wick before each use
6. Never leave candles unattended
Our taper candles are dipped to the standard 7/8” base, but can vary as a result of the dipping process.
Too big? Shave a bit off with our Candle Sharpener.
Too small? Add Candle Helper wax as needed.
Tap below to watch instructions.
]]>Every gardening endeavor takes a bit of trial and error. Every wilted leaf has a lesson. Every unproductive plot yields tips for next season.
Our team rounded up some recent learnings from their gardening attempts – successful and otherwise! Scroll on for tips.
“Succession planting! You can get pretty sophisticated about staggering maturation dates, but the simplest way to make sure you're harvesting all summer long is to space out plantings of any given vegetable by 2-4 weeks.” – Rosalie
“Mike and I currently have a window herb garden (TFS herb seeds!). Only tip I can think of for these is to make sure they are in a sunny window spot and that they are in pots with drainage holes to make sure they aren't over-watered! We love our Genovese Basil for fun summer cocktails.” –Julia
“Companion planting is also helpful. Certain vegetables like being grown near each other in gardens (tomatoes, basil, peppers | corn, beans, cucumbers, peas | spinach, strawberries), and planting friends with friends can help increase yield, decrease disease, and limit pests!” – Caitlin
“I don’t get a ton of direct light each day due to a huge tree that shades my yard. I have the best luck with leafy greens and herbs. Arugula is my favorite. I did try peas this year to see what would happen and they’re already growing!” – Sierra
“I have a shared garden with my neighbors and we've dedicated a section this year to different varieties of peppers! It's my first time planting them but I've learned how important it is to space peppers more than 12 inches apart so they have the proper room to grow. Needless to say with all of the varieties, we have quite a large pepper garden!” – Olivia
]]>Spring flowers really are magical. Their subtle, tonal hues – dusty mauves and palest yellows – are like the best palette of highly custom, fancy paints. There’s a sophistication, a softness, that you just cannot get in other seasons.
From soft stem blooms to flowering branches, we rounded up some of our favorites. Bring this list to your florist and show us what you find!
SUNLOVER TULIP
BRIDAL WREATH SPIREA
MIMOSA
ICELANDIC POPPY
HELLEBORUS ORIENTALIS
BOLLENE TULIP
ROSEMOOR GOLD DAFFODIL
COMMON LILAC
HELLEBORUS NIGER
YELLOW POMPONETTE TULIP
BROWNIE SWEET PEA
BUTTERFLY RANUNCULUS
HELLEBORUS LIGURICUS
YELLOW LADY SLIPPER
Want some arrangement inspiration? Check out one of our many tutorials for tips and tricks.
]]>Welcome to Dobbs Ferry, New York: the heart and home of 㽶Ƶ.
Our studio is where it all happens! Where new products are developed, where plants are watered and boxes are packed, where flowers are arranged and a photoshoot could happen at a moment’s notice. This space is home to 㽶Ƶ and our in-house floral studio, Poppies & Posies. These two go hand-in-hand, inspiring one another season after season.
Scroll through for the full tour and to see some of our favorite TFS pieces:
This workstation is often used for our in-house floral studio Poppies & Posies.
We could talk tools forever! We’ve curated the best ones here.
Sierra Steifman, founder of Poppies & Posies and 㽶Ƶ.
Our Ceramic Hanging Flower Frog Vase works for florals and herbs.
Our taper candles are handmade in Ohio. Shop all colors and candleholders here.
Our Ceramic Flower Frog Bowl makes an expert arrangement in no time.
Organization is key! Shop our canvas wall organizers.
Truly an essential — our teflon-coated carbon steel Floral Clippers are expertly made in Japan.
Multi-purpose Flower Frog Vases — we love to use these as pen holders too!
:
“Bring instant atmosphere and more sophisticated fragrances to the party.”
— CATHERINE DASH
Our new Outdoor Incense sticks are here to bring atmosphere to your garden gatherings, be it a weeknight dinner or big event. Keep bugs at bay and get a delicious whiff of natural essential oils as the breeze passes you by.
The finishing touch to bring warmth and atmosphere to your outdoor gathering. Our Outdoor Incense is handcrafted in Connecticut with naturally insect-repellant, therapeutic grade essential oils. Sturdy, punk wood sticks can be placed in a planter, incense holder, or directly into the ground or soil.
Each package includes 20, 19” punk wood sticks, each with over 2-hour burn time.
Tea tree, Lavender, & Neem
An herbaceous and minty blend, to brighten and cleanse.
Lemongrass, Orange, & Clary Sage
An infusion of citrus and sage, to energize and awaken. Wild-crafted lemongrass is harvested from its natural environment.
Sage, Coffee, Cinnamon leaf, & Cedarwood
Warm wood, coffee, and spice, for balance and comfort.
From Shakespeare’s Ophelia to the orange blossom crowns of ancient China; from Frida Kahlo to Ukrainian vinok – floral crowns have a rich and meaningful history around the world. Plus they just feel pretty. There’s nothing more beautiful than being adorned in nature.
Scroll on to see what we made and how to craft your own.
Grab some blooms and give it a whirl! We’d love to see what you make.
– Team TFS
]]>Whether you’re starting a kitchen garden, edible flowers, or herbs, proper seed starting will set you up for success. You can technically start seeds indoors throughout the year, but to determine which dates are best for your zone.
SUPPLIES NEEDED
Watering can
Gardening gloves
Trowel
Seed starting mix
72-cell plug flat
Flat tray
Clear lid
Pots
Seeds
Optional:
Extra labels
Heating pad
Grow light
STEP 1
Add your seed starting mix to a large bowl or planter, thoroughly moistening with water.
STEP 2
Fill the cells of your seed tray, gently tamping down to eliminate any air pockets.
STEP 3
Using your metal garden markers, a pencil, or a finger, make a shallow indentation for your seed.
A good rule of thumb is to plant your seed as deep as its longest side. For the seeds we’re planting today – this isn’t deep at all.
STEP 4
Empty your seed pack into a dish for easy access and sprinkle a few seeds (2-3) into each cell.
STEP 5
Gently cover newly sown seeds with a dusting of seed starter mix.
STEP 6
Label each row with a garden marker.
Cover with your clear lid and set in a warm spot – near a radiator or even on a heating pad.
STEP 7
Your seeds are likely to sprout before watering is necessary, but check the soil every few days to make sure it hasn’t dried out. If water is necessary, bottom water to avoid disturbing the seeds.
STEP 8
Once the majority of the cells have sprouted seedlings, remove the cover and set the tray in a spot with bright light – or under a grow light.
STEP 9
Check on the seedlings frequently – daily or every other day, making sure that the soil stays moist.
If you are not using a grow light you will likely need to rotate your tray regularly to balance the lean of the seedlings towards the sun.
STEP 10
Once your seedlings begin to outgrow the tray, you can start the process of ‘hardening off’ or transitioning them outdoors – as long as there is no chance of frost. Set the tray outdoors, in a safe spot, for an increasing amount of time each day. Start with a couple hours on day one and gradually increase over the course of a week. Once they’re fully acclimated to the outside temperature, they can remain outdoors.
If it is not yet warm enough for this, gently poke them out of the tray and transplant with regular potting soil into larger pots. Move the pots as needed.
Share your garden progress with us. We’d love to see what you grow.
For more thoughts on garden planning, visit this post and keep an eye out for more tips and tricks.
]]>Nothing beats the pure delight of a new houseplant – especially this time of year! We picked up a few new plants for the TFS studio, to keep us going while we count down the days to spring.
Scroll on to meet them and bookmark this for easy care tips!
PEACOCK PEPEROMIA
peperomia piccolo banda
Sun – bright, indirect light
Water – Soak infrequently, once the top inch or two of soil has dried out.
Food – monthly during the growing season
CRISPY WAVE FERN
Japanese asplenium nidus fern
Sun –bright, indirect light
Water – Maintain consistent, lightly moist soil, being careful not to pool water inside the basin of the fern itself.
Food – Only use liquid fertilizer, at half strength, during the growing season.
MAIDENHAIR FERN
adiantum raddianum
Sun – indirect sunlight and well-draining soil
Water – Mist soil and leaves and water frequently to ensure soil stays hydrated.
Food – no fertilizer needed
SATIN POTHOS
scindapsus pictus
Sun – bright, indirect light and warm temperatures
Water – Water thoroughly, allowing the top inch of soil to dry between waterings.
Food – Fertilize monthly during the growing season.
WATERMELON PEPEROMIA
Sun – bright, indirect light
Water – Allow the soil to dry to the touch at the top and then water thoroughly, but much less during winter.
Food – Fertilize during the growing season, every 2-4 weeks.
Tap below to watch!
Grow your own cutting garden and surround yourself with color and texture, all season long. We’ve curated our selection of seeds with our favorites for floral arranging.
Want a few pointers on our favorite varieties? Scroll on.
We love late summer for flowers because there's so much local product available! Whether you're buying them at the farmers market or growing them yourself, zinnia is beloved because it's so easy to grow, has beautifully intricate eyes, and amazing variation in shape and color amongst a single variety. Zinnia Illumination is our favorite, and pairs perfectly with some of our tried and true juicy summer color palettes.
ZINNIA ILLUMINATION
zinnia elegans
Plant seeds into the garden after the last frost. When the soil is warm, sow thinly, six seeds per foot. Cover lightly but firmly. Keep surface from drying out until emergence. Thin after the first true leaves appear.
Harvest before flowers are completely open. Deadheading is necessary to prolong blooming and encourage branching. Zinnias should last 7-10 days in a vase.
height: 12-18”
light preference: Sun
germination: 3-5 days at 80-85°
plant spacing: 9-12”, 1/2” deep
Another easy-to-grow cutting garden favorite, we sell phlox seeds as a mix of pinks because we love every variety. We also love that it blooms and blooms in the garden until the first frost, has a sweet fragrance, and lasts an entire week as a cut flower! A perennial, phlox will spread easily and come back year after year.
MIXED PHLOX
phlox
Plant seed into the garden as soon as soil can be worked in spring. Cover seed with 1/2” fine soil. Darkness is required for germination. Thin when first true leaves appear.
Harvest when half of blooms on a stem are open. Expect a vase life of seven days.
height: 16-20”
light preference: Sun
germination: 5-10 days at 60-65°
plant spacing: 8-12"
Just as lovely in a vase as they are in the garden, snapdragons are the perfect linear element in an arrangement with their ruffly faces and many blooms. They hold a place in our hearts for providing endless amusement as children; if you pinch their dragon face-like blooms laterally their little dragon mouths pop open!
SNAPDRAGON
antirrhinum majus
Start seeds indoors 8-10 weeks before the last frost, and transplant once the weather has warmed. Pinching encourages branching.
Harvest when florets on the lower 1/3-1/2 of the spike have just opened, before insects can pollinate them. They will last 7-10 days in a vase.
height: 28-26”
light preference: Sun/Partial Shade
germination: 7-14 days at 70-75°
plant spacing: 4-12”
Includes Zinnia, Larkspur, Forget-Me-Not, Cosmos, Sweet Sultans, Calendula, Feathered Celosia, Annual Baby's Breath, Indian Blank, Tricolor Daisy, and more. Perfect for the laissez-faire gardener, the annual flower mix is a great way to direct sow for a whole range of varieties and colors. We love tossing a few packs down in neglected areas of the garden and marveling at what emerges! It's also a wonderful way for a beginner gardener to get to know the different varieties.
ANNUAL FLOWER MIX
50 seeds — annuals
Select a sunny site of about 20 sq ft and prepare the soil, planting after the last frost. Combine seeds with a small container of sand and sprinkle over sowing area. Rake lightly and water.
height: Varied
light preference: Sun
germination: 5-21 days at 60-65°
plant spacing: 8-12”
Blue is a rare color in flowers, and forget-me-nots come in a most lovely delicate shade. With such an evocative name it's no wonder they are a treasured garden addition! They self-seed easily and prefer shaded moist locations, meaning that they'll happily ramble through ditches and boggy areas, bringing a little color to otherwise hard to use spots.
FORGET-ME-NOT BLUE
myosotis
Plant seed into the garden as soon as the soil can be worked easily. Cover seeds lightly with soil, as darkness is required for germination. Harvest when half of the flowers are open.
height: 18-24”
light preference: Sun/Partial Shade
germination: 5-8 days at 65-70°
plant spacing: 9-12”
Shop Individual Seeds, and our bestselling Edible Flower Seed Kit.
We want to see what you grow this season! Share with us
]]>